Blog
How to Retexture Popcorn Ceilings
Popcorn ceilings are extremely popular in older homes. For homebuilders back in the day, popcorn texture was convenient and quick. With this finish on ceilings, workers could spend less time smoothing things out and use the popcorn to cover over any imperfections. While we can see why this would be the finish of choice for builders on a time crunch, it may not be the preferred texture for you. If your home feels outdated, here are the steps you can take to retexture your ceiling.
Test
Because removing popcorn ceilings can be tough manual labor, it would be very frustrating, (or dangerous. More on that in a bit) to start working only to find that you cannot continue. So, do yourself a favor and scrape a test area first. For the first scrape test, do it dry. This is because sometimes popcorn comes off easily on its own. Doing this test will help you see whether you can skip a step or not. If it is not coming off easily, then wet it. If the water does not seep into the popcorn, this most likely means that the ceiling was painted. From here you can decide if it is still worth it to you to put in the muscle to scrape it off or cover it up somehow.
Not only do you want to test for how difficult the job may be, but you also want to test for asbestos. As you probably know, asbestos is a hazardous mineral that is widely known to cause lung cancer. Definitely do not want that being released into your home! To get your ceiling tested, contact your local health department. If the test comes back positive, it is best to just cover the ceiling with new drywall or wooden planks.
Prep
This project is very messy. As with any project, you can manage cleanup time by prepping properly. Start by taping plastic wrap around your walls and floor. If possible, remove any furniture in the room. If you do not want to or cannot do that, just be sure to wrap them with plastic too.
Next, remove ceiling fans and fixtures. You may think that you can simply work around them, but trust us, that will only frustrate you. And since you have to wet the surface, you do not want to risk getting water into electrical features. Cover any electrical boxes with tape and shut off power to them.
Last order on the prep agenda is to wet the ceiling area. You can make this task easier by using a simple garden sprayer. Be aware that you do not want to completely soak the surface. Doing so could lead to the damage of your drywall and even loosen the joint tape. So, only give it a light spray and allow it to soak in for 15 minutes.
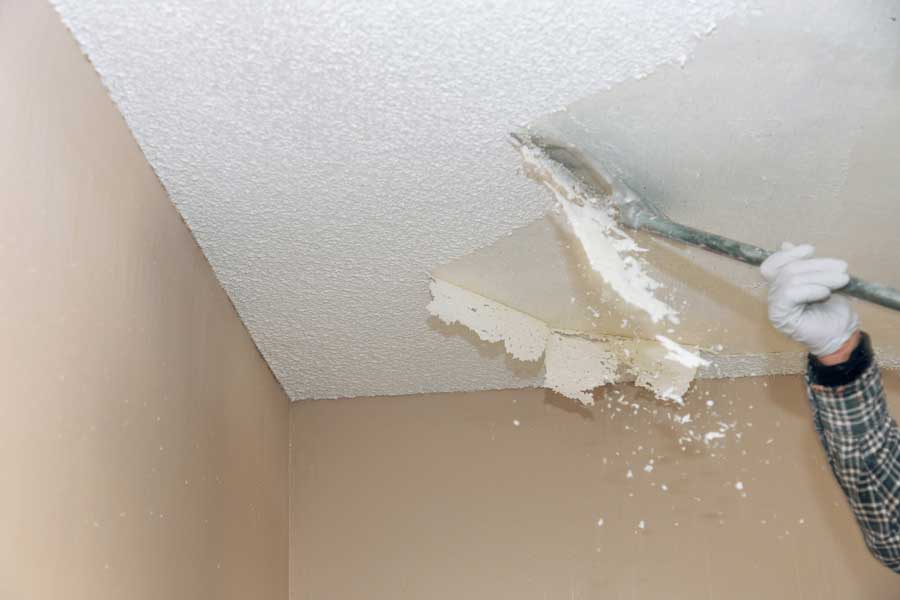
Scrape
Begin by working in small sections at a time. If you do not, then the popcorn could dry by the time you get to it, making it harder to work with. Rewet areas as necessary. Enlist the help of a mud pan to catch drippings and to clean off the edges of your knife. This way you can minimize the risk of tracking mess as you move about the room.
As we mentioned, many builders used popcorn to cover up imperfections. After you are done scraping, finish up by sanding the ceiling to prepare it for painting.
And there you have it! Putting in the work to smooth out your ceilings will pay you back by increasing your home value. Of course, if you do not have the time or desire to do this project yourself, there are service providers out there who can do it for you.
Goodwyn Building aims to design homes that stand the test of time. On top of that, we are the leading builders of energy efficient and high-performance homes in the Montgomery area. Why not have a look around our site to see what we are all about.
By Goodwyn Building 1-16-2020
Recent:
Categories
Archive
Jun 2026
May 2026
Apr 2026
Mar 2026
Feb 2026
Jan 2026
Dec 2025
Nov 2025
Oct 2025
Sep 2025
Aug 2025
Jul 2025
Jun 2025
May 2025
Apr 2025
Mar 2025
Feb 2025
Jan 2025
Dec 2024
Nov 2024
Oct 2024
Sep 2024
Aug 2024
Jul 2024
May 2024
Apr 2024
Mar 2024
Feb 2024
Jan 2024
Dec 2023
Nov 2023
Oct 2023
Sep 2023
Aug 2023
Jul 2023
Jun 2023
May 2023
Apr 2023
Mar 2023
Feb 2023
Jan 2023
Dec 2022
Nov 2022
Oct 2022
Sep 2022
Aug 2022
Jul 2022
Jun 2022
May 2022
Apr 2022
Mar 2022
Feb 2022
Jan 2022
Dec 2021
Nov 2021
Oct 2021
Sep 2021
Aug 2021
Jul 2021
Jun 2021
May 2021
Apr 2021
Mar 2021
Feb 2021
Jan 2021
Dec 2020
Nov 2020
Oct 2020
Sep 2020
Aug 2020
Jul 2020
Jun 2020
May 2020
Apr 2020
Mar 2020
Feb 2020
Jan 2020
Dec 2019
Nov 2019
Sep 2019
Aug 2019
Jun 2019
May 2019
Apr 2019
Jan 2019
Nov 2018
Sep 2018
Aug 2018
Jun 2018
Jan 2018
Nov 2017
Oct 2017
Jun 2017
May 2017
Jan 2017
Aug 2016
May 2016